
Bunk beds are a great space-saving solution for families with multiple kids, small bedrooms, or guest rooms. They not only provide comfortable sleeping arrangements but also add a fun element for children. However, assembling a bunk bed can be challenging if you don’t follow the right steps. A poorly assembled bunk bed can be unsafe and lead to accidents.
In this guide, we will walk you through a step-by-step process to assemble your bunk bed safely and correctly at home. Whether you are a beginner or have some experience with furniture assembly, this article will help you set up your bunk bed without any trouble.
Table of Contents
What You Need Before Starting
1. Read the Instruction Manual
Every bunk bed comes with an instruction manual from the manufacturer. Before you start, take time to read it carefully. The manual includes:
- A list of all parts and tools needed.
- Step-by-step assembly instructions.
- Safety precautions for proper installation.
2. Gather the Necessary Tools
To make the assembly process smooth, ensure you have the following tools ready:
- Screwdriver (manual or electric)
- Allen wrench (often provided in the package)
- Hammer (if required for wooden parts)
- Measuring tape
- Safety gloves (to protect your hands)
- A ladder or stool (for reaching high areas)
3. Choose a Safe Assembly Area
Pick a spacious and clean area to assemble the bunk bed. Ideally, assemble the bed in the room where it will be placed. This avoids difficulties in moving the heavy structure after assembly.
Step-by-Step Guide to Assembling Your Bunk Bed
Step 1: Unpack and Organize All Parts
Carefully open the package and take out all parts. Lay them out on the floor and match them with the instruction manual to ensure you have all the necessary components. Missing any parts can cause problems during assembly.
Step 2: Assemble the Bed Frame
The bunk bed frame is the main structure that supports the weight. Follow these steps:
- Connect the side rails to the headboards and footboards. Use the screws or bolts provided.
- Ensure the frame is stable. Tighten all screws properly but avoid overtightening, as this can damage wooden parts.
- Check alignment. Make sure the frame is even and not leaning to one side.
Step 3: Attach the Support Slats or Base Panels
Most bunk beds come with wooden or metal slats that hold the mattresses. If your bunk bed has slats:
- Place them evenly across the bed frame.
- Secure them using screws if required.
- Double-check spacing. Ensure slats are evenly spaced for proper weight distribution.
If your bed has a solid base panel, simply attach it using the provided screws.
Step 4: Assemble the Upper Bunk
Once the lower bunk is stable, move on to the upper bunk:
- Fix the upper bed frame on top of the lower frame. Some bunk beds have built-in brackets or connectors for this.
- Secure with bolts or screws. Tighten them to prevent movement.
- Shake gently to test stability. If it wobbles, recheck the screws.
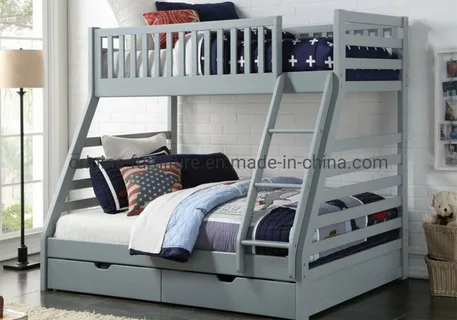
Step 5: Attach the Guardrails
The guardrails are a critical safety feature, preventing falls from the upper bunk.
- Align the guardrails along the sides of the upper bunk.
- Secure them tightly using the provided screws or brackets.
- Ensure there is no gap between the mattress and guardrail. Gaps can be dangerous for children.
Step 6: Install the Ladder
The ladder allows easy access to the top bunk. Depending on the design, it may be detachable or built-in:
- Position the ladder at the side or foot of the bed.
- Secure it firmly with screws or brackets.
- Check for stability by applying slight pressure.
Step 7: Add the Mattresses
Once the bunk bed is fully assembled:
- Choose the right mattress size as recommended in the manual.
- Place the mattress carefully on both the upper and lower bunks.
- Ensure the mattress fits snugly within the frame.
- Check that the top bunk mattress height does not exceed the guardrail height.
Safety Tips to Follow After Assembly
1. Test the Stability of the Bunk Bed
Before letting anyone sleep on the bunk bed:
- Gently shake the structure to ensure it is stable.
- Sit on both bunks to check weight distribution.
- Tighten any loose screws.
2. Set Rules for Using the Bunk Bed
For households with children, establish the following safety rules:
- No jumping on the bunk bed.
- Only one person on the top bunk at a time.
- Always use the ladder to climb up and down.
- Avoid hanging items (like belts or ropes) on the bed to prevent accidents.
3. Regularly Check and Maintain the Bed
Over time, screws may loosen, and wood may develop minor cracks. To ensure long-term safety:
- Inspect all screws and bolts every few months.
- Tighten any loose parts.
- Replace worn-out slats or damaged parts if needed.
Common Mistakes to Avoid When Assembling a Bunk Bed
1. Skipping the Instruction Manual
Many people assume they can assemble the bed without reading the manual. This can lead to errors, missing parts, or improper assembly.
2. Not Securing the Guardrails Properly
Guardrails prevent falls from the top bunk. Always double-check that they are firmly attached.
3. Using the Wrong Tools
Using improper tools can damage screws or weaken connections. Stick to the tools recommended in the manual.
4. Assembling in the Wrong Place
If you assemble the bunk bed in a different room, you may face difficulty moving it later. Assemble it in its final location.
5. Overloading the Top Bunk
Each bunk bed has a weight limit. Overloading the top bunk can make it unsafe. Always follow the manufacturer’s guidelines.
Conclusion
Assembling a bunk bed at home can be an easy and safe process if you follow the right steps. Start by reading the manual, gathering tools, and preparing the space. Follow the step-by-step guide to secure the frame, attach guardrails, and install the ladder. Finally, test stability and follow safety tips to ensure long-term durability.
For more insightful articles related to this topic, feel free to visit motherboardguid.com